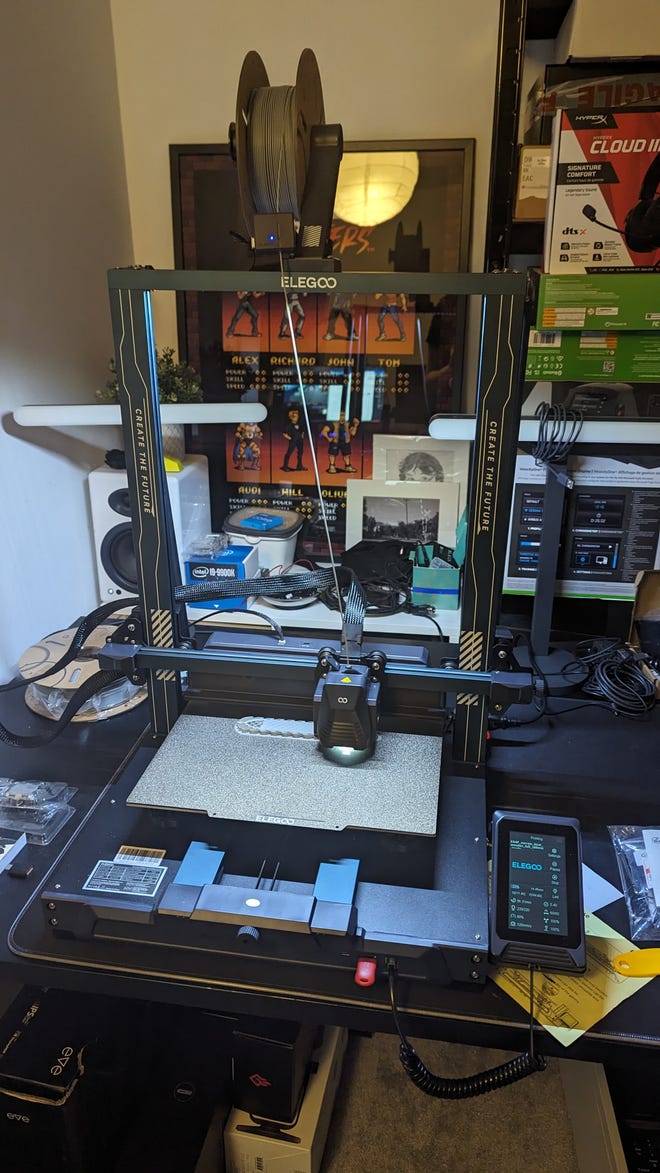
I’ve all the time been fascinated by 3D printers however I’ve by no means recognized what I might do with one. When Shenzhen-based agency Elegoo provided to ship their $350/£300 Neptune 4 Plus for evaluation, I figured I would higher take them up on their provide and discover out simply what’s attainable with a contemporary 3D printer – and what challenges awaited me as an entire newbie. This is what I’ve found – from the gauntlet of the preliminary setup course of to the successes and failures which have outlined the primary few weeks of 3D printing.
First, the setup course of. The Neptune 4 Plus is available in items, so you could observe an IKEA-style meeting course of to hitch the most important elements, mount the included management pod and join a bunch of wires. There is a printed guide offered, however there’s additionally a digital model on a USB stick. That stick additionally accommodates a video tutorial for the setup course of, which I adopted rigorously. The construct itself is sort of easy and should take round an hour, with no actual challenges – every step’s smaller elements like screws are neatly labelled in separate baggage and all the instruments are offered which is sweet.
The actual problem comes if you’ve screwed all the pieces collectively, plugged all the pieces in and turned the machine on for the primary time – as now it is time for levelling. This course of requires you to boost or decrease the nozzle, hundredths of a millimetre at a time, till a chunk of paper between the nozzle and the print mattress may be pulled out however not pushed again in. This course of is repeated on six factors across the mattress, with the adjustment coming this time from springs beneath that you could tighten or loosen by rotating a dial. Once more, you are in search of an honest quantity of friction between nozzle, paper and mattress; judging how a lot friction takes some endurance.
After ending the six factors, I had seen a YouTube video that really helpful not going forward to the subsequent step – auto levelling – however as an alternative to return to the preliminary levelling step, levelling the centre level as soon as once more, doing the six springs once more after which lastly shifting onto the auto-levelling process. I did this – solely tearing my piece of paper a couple of times – and was rewarded with the auto levelling stage, which sees the print head transfer to 36 completely different factors on the mattress in sequence.
From right here, it is a easy matter of including a spool of PLA to the holder on the high of the machine, feeding it by the ‘out of PLA’ sensor, pushing it into the highest of the print head so far as attainable after which lastly urgent the ‘load’ button to warmth up the top and begin pulling the PLA by it. I did not fairly know what to do with the PLA that flowed by, however I used the plastic scraper instrument to poke it away from the print mattress and that appeared to work OK.
The USB drive comes pre-loaded with a couple of designs, so I opted to print a small mannequin Buddha because it appeared the quickest to make. It estimated a construct time of round 20 minutes, however after round 12 the Buddha was full – and appeared in good working order, with extraordinarily faint horizontal strains seen however in any other case extra element than I used to be anticipating on a determine standing solely a few inches excessive.
My greatest mistake on that first night time was beginning up a second print immediately: this time a plant pot! I used to be excited to provide one thing really helpful and show the idea out, however the print took round three hours – and it was already previous midnight. I did not need to fall asleep and even go away the room for very lengthy, lest the construct be ejected at excessive pace or the printing to in any other case go haywire, so I babysit it for these three hours whereas doing work on the opposite aspect of the room. PLA fumes aren’t extremely poisonous, I do not suppose, however I opened a couple of home windows anyway simply to make certain.
Moreover my rising weariness, the problem with this late-night print was that the Elegoo made a heck of a load of noise with its assortment of tiny (80mm?) followers at full pelt, with the shaking of the desk and the squeak of the print head because it raced round in circles. I ended up shifting principally all the pieces off the desk to cease stuff banging rhythmically into the wall and adjusted the machine to ‘silent’ mode – amusingly, ‘regular’ and ‘sport’ are the opposite two pace settings – and this made me really feel rather less responsible for probably protecting my neighbours awake late into the night time with a suspicious racket.
After this preliminary trial, I felt more and more comfy with the machine and began churning out prints from my machine over WiFi to the printer beneath the motto ABP – all the time be printin’. Over the subsequent few days, I downloaded a ton of fashions from Thingiverse and made:
- Colt 1911 pistol (the most effective factor I’ve ever printed – unbelievable element)
- Weighted Companion Dice keycap (printed in six minutes!)
- Snowflake Christmas decoration (extraordinarily speedy, if a bit gray)
- Two nutcrackers (genuinely helpful and funky to see an ideal working screw)
- One other Buddha (for testing functions)
- USP-S w/ detachable supressor (the largest factor I’ve ever printed however fiddly)
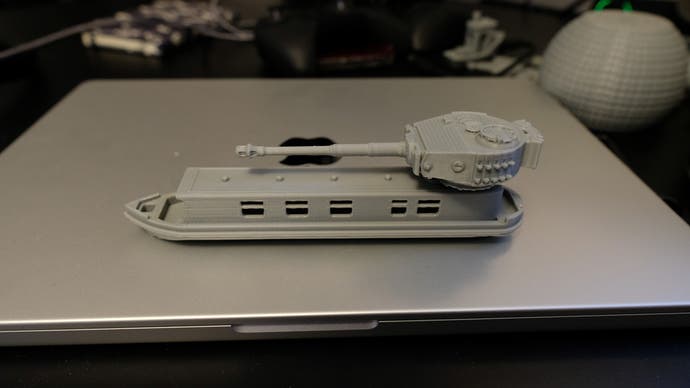
- Narrowboat (printed an enormous pile of string earlier than I found one thing referred to as “helps” that have to be beneath “overhangs” so the 3D printer is not printing into “empty air”)
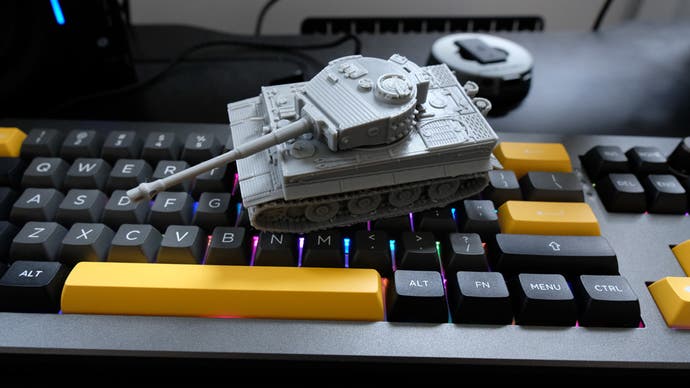
- Panzerkampfwagen VI Tiger 1 Ausf. E tank with rotating turret (that required an enormous quantity of effort to take away helps printed within the tiny hole between the treads and the chassis)
- Traditional rocket (so I may use this text title)
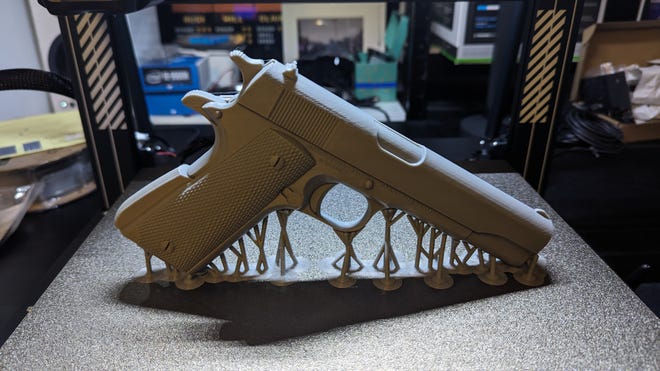
I used to be fairly proud of the element – seeing tremendous lettering on the aspect of the 1911 was notably jaw-dropping – and the pace at which all the pieces was produced, with the longest print (the USP-S) taking round eight hours, with smaller fashions just like the snowflake, nutcrackers, Budda and rocket being completed in round half an hour.
After doing fairly a couple of prints, I attempted utilizing a slicer program I would seen really helpful on-line, OrcaSlicer, somewhat than the offered possibility of Elegoo Cura 4.8. Although a profile for the Neptune 4 Professional existed, which I figured can be shut sufficient, it will definitely failed. The following print I attempted slammed into the nozzle into the print mattress, and after this setback, plenty of stuff I attempted failed, even printing pre-sliced pattern fashions supplied with the printer, and I used to be satisfied that I massively messed issues up – I would busted the nozzle, or borked the firmware someway.
Fortunately, my points have been resolved with repeated guide and computerized relevelling and I acquired again to work. Slowly, I realized some needed supporting abilities: the way to add helps utilizing Cura, which certainly would have prevented some earlier disasters, including completely different sorts of helps, after which eradicating these helps from each exterior (simple) and inner (actually robust) placements. Not each print survived unscathed, however nothing was completely ruined both. I used to be making genuinely cool stuff, no less than for those who did not look too intently on the tremendous element.
Round per week on, it appears like an excellent time to write down up this evaluation and share my experiences. That is most likely unsurprising, however the primary factor right here I’ve realized is how little I really learn about 3D printing and the way complicated the follow is! This is without doubt one of the greatest and worst components about selecting up a brand new passion – one thing that appears initially easy and simple is revealed to have lovely, terrifying complexity that may simply put you off fully for those who’re not cautious.

Do not get me flawed, studying Reddit threads and watching YouTube movies supplies plenty of helpful data, however it may be nearly overwhelming to see what number of variables there are to tweak and the way a lot you should be protecting in thoughts: slicing your fashions, updating your firmware, selecting your slicer software program, changing nozzles, performing upkeep, utilizing completely different supplies and so forth and so forth.
In the end although, I am not going to fret about that aspect of issues an excessive amount of – I am going to search assist if issues go horribly flawed, however for now I am having fun with the power to think about one thing, go “ah that may be cool to print”, after which have a bit of plastic mannequin of it a couple of hours later. If it is not completely printed or it goes a bit flawed, that is tremendous – I am going to determine issues out finally and I am not going to emphasize about issues an excessive amount of within the meantime.
The massive query I had coming into this was “is it really helpful to have a 3D printer?” I believe it is helpful, however that utility comes at a price – bodily area on a desk – about half of an Ikea Idasen 160x80cm desk is fully subsume; time spent printing, post-processing, planning and sustaining; the necessity to hold home windows open in winter to stop the build-up of PLA fumes; and naturally the funding into the printer itself.
For that although, you may make a virtually limitless number of small and medium-size knick-knacks for a comparatively modest worth in PLA and energy meaning you are sorted for presents for no less than a couple of years (till your folks get uninterested in 3D-printed stuff!). You may make helpful stuff too, just like the plant pots and nutcrackers I made, however the problem is extra about enthusiastic about what you can really do with – and gaining the abilities to design bespoke components your self – than it’s about mastering print settings. I determine that you’re going to make your a refund after a comparatively minor variety of prints, and the longer the printer works, the higher worth it turns into.
And by way of worth, the Neptune 4 Plus does look like an excellent one. It is fairly huge in comparison with different 3D printers I’ve seen, but comparatively reasonably priced. The firmware and software program stay immature, I believe it is truthful to say, with Elegoo’s offered Cura software program being on model quantity 4.8 whereas the primary Cura construct is on the (reportedly much-improved) model 5.5… however out of the field, all the pieces does work. It is actually not plug and play, however the construct course of is easy and comparatively transient, and having some fashions offered on the printer itself gave me the boldness to attempt bigger and extra complicated prints earlier on. I just like the WiFi performance, I just like the built-in LEDs for the mattress and the nozzle, I like the power to do guide mattress levelling.
So, in the long run, I actually fairly like this 3D printer and at $350/£300 it actually represents good worth for cash given its dimension. It simply must mature in order that I can use it with completely different software program packages and improve the firmware with out concern. (Going onto the devoted subreddit and seeing experiences of individuals bricking their units as a result of a firmware replace just isn’t an excellent look, that is for certain.) For now although, for those who keep on with the default firmware and the default software program bundle, it appears surprisingly bulletproof for inexperienced persons – simply bear in mind to degree the mattress a couple of occasions and wipe down the printing space with rubbing alcohol each few prints, and you need to be good to go!
I am going to proceed to experiment with the Neptune 4 Plus behind the scenes, so let me know if there’s one thing you need to know – or one thing you need me to attempt to print!